Tutorial #06 : recording a movie with 3DF Zephyr
Recording movies
Welcome to the 3DF Zephyr tutorial series.
In this recipe, you will learn how to easily create a movie of your reconstruction in 3DF Zephyr.
This tutorial can be done also with the evaluation version of 3DF Zephyr that can be downloaded here (except the actual file export phase).
Step 1 – Introduction and setup
With 3DF Zephyr, it’s possible to create an animation to show your reconstructed 3D model and export it as a standalone video file that can be played on any computer or uploaded to your online video service of choice.
The Cherub dataset can be used to follow this tutorial.
 | Download Dataset – Cherub |
 | Download – Cherub .ZEP file |
Step 2 – Creating an animation
In order to create a video with 3DF Zephyr, you need to set up a series of keypoints: a keypointis a location in 3D space associated with an order and a specific time in the animation. After setting the list of keypoints, Zephyr will automatically interpolate the positions and create a nice and smooth animation going from the first point to the last one.
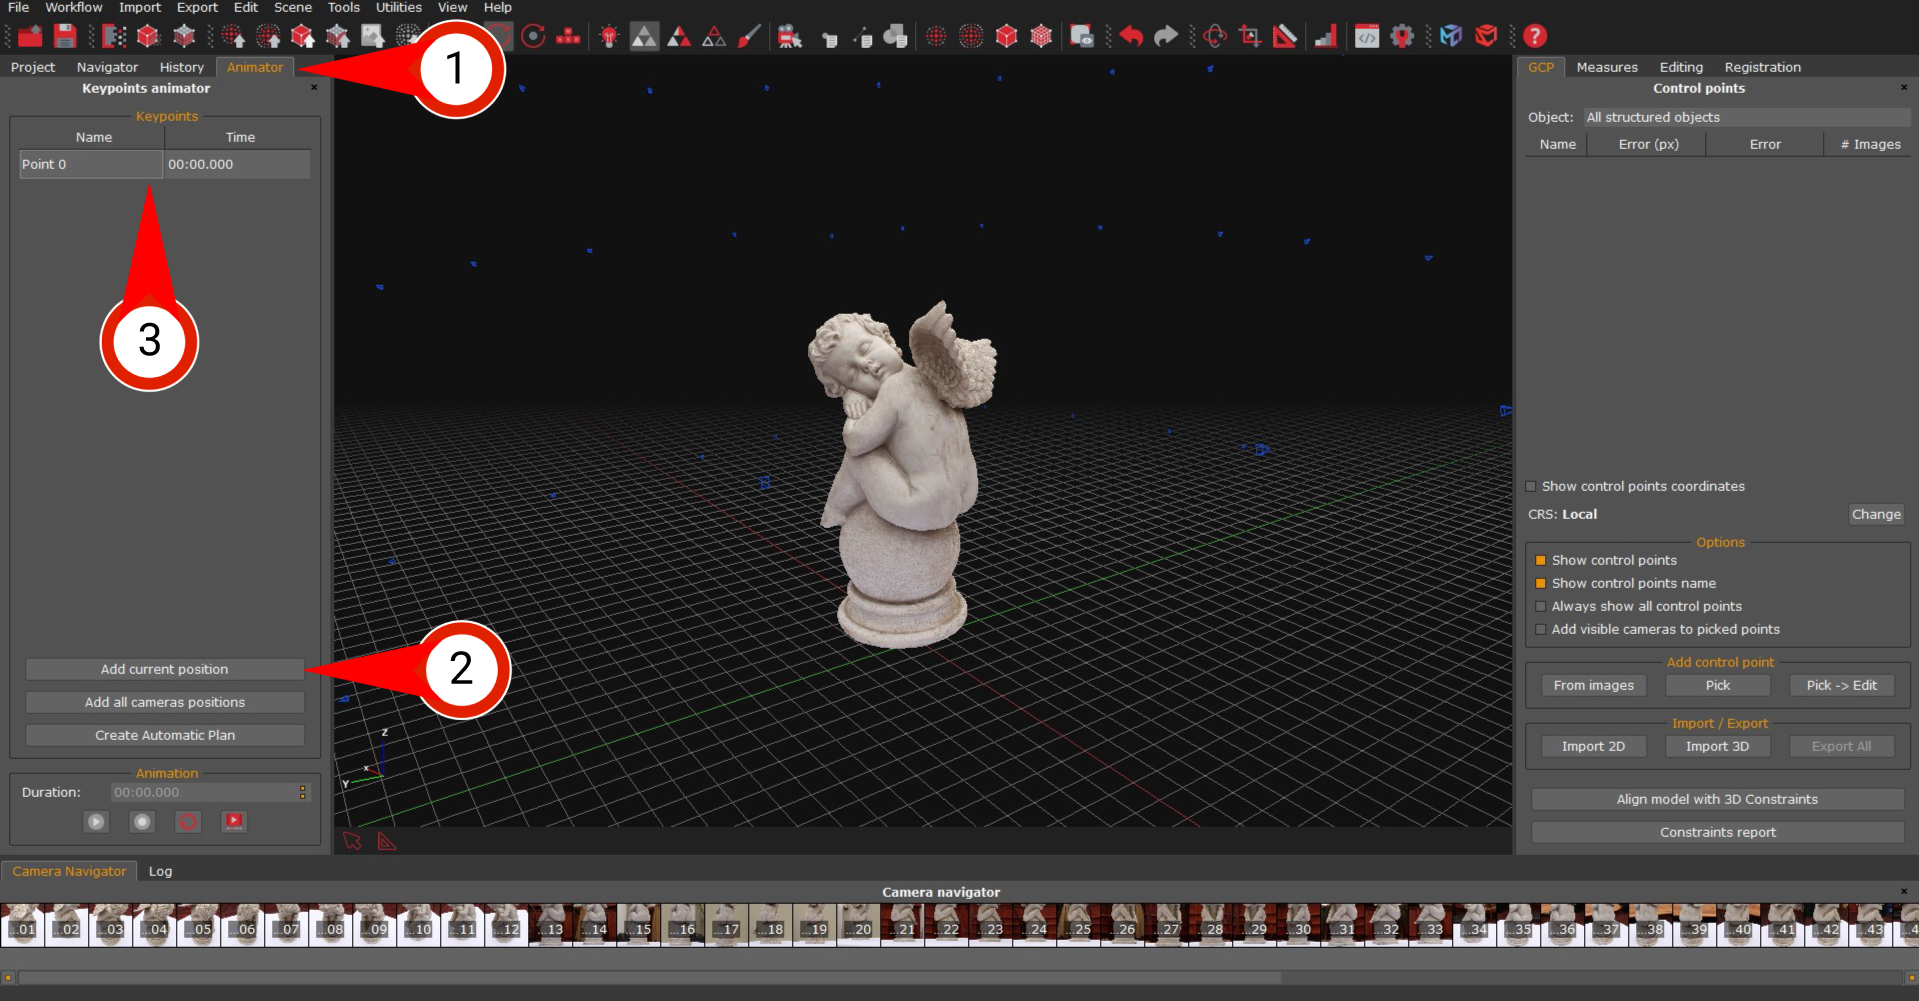
Navigate the scene to the point where to start the animation to begin: what you see is what you get, so when you are ready to set your first keypoint, click the “Animator” (1) tab. Click on the “Add current Position” (2) button and you will notice that a new keypoint will appear in the “keypoint list” (3).
As you can see, a name and a time are assigned to each keypoint. You can delete one or all the points, manually edit their properties, or move the virtual camera to a specific point by right-clicking on the keypoint name you want to edit.
Keep adding points around the reconstructed 3D model.
The above procedure allows you to add keypoints manually, but you can also leverage one (or more) of the four automatic plans available in the animation tool.
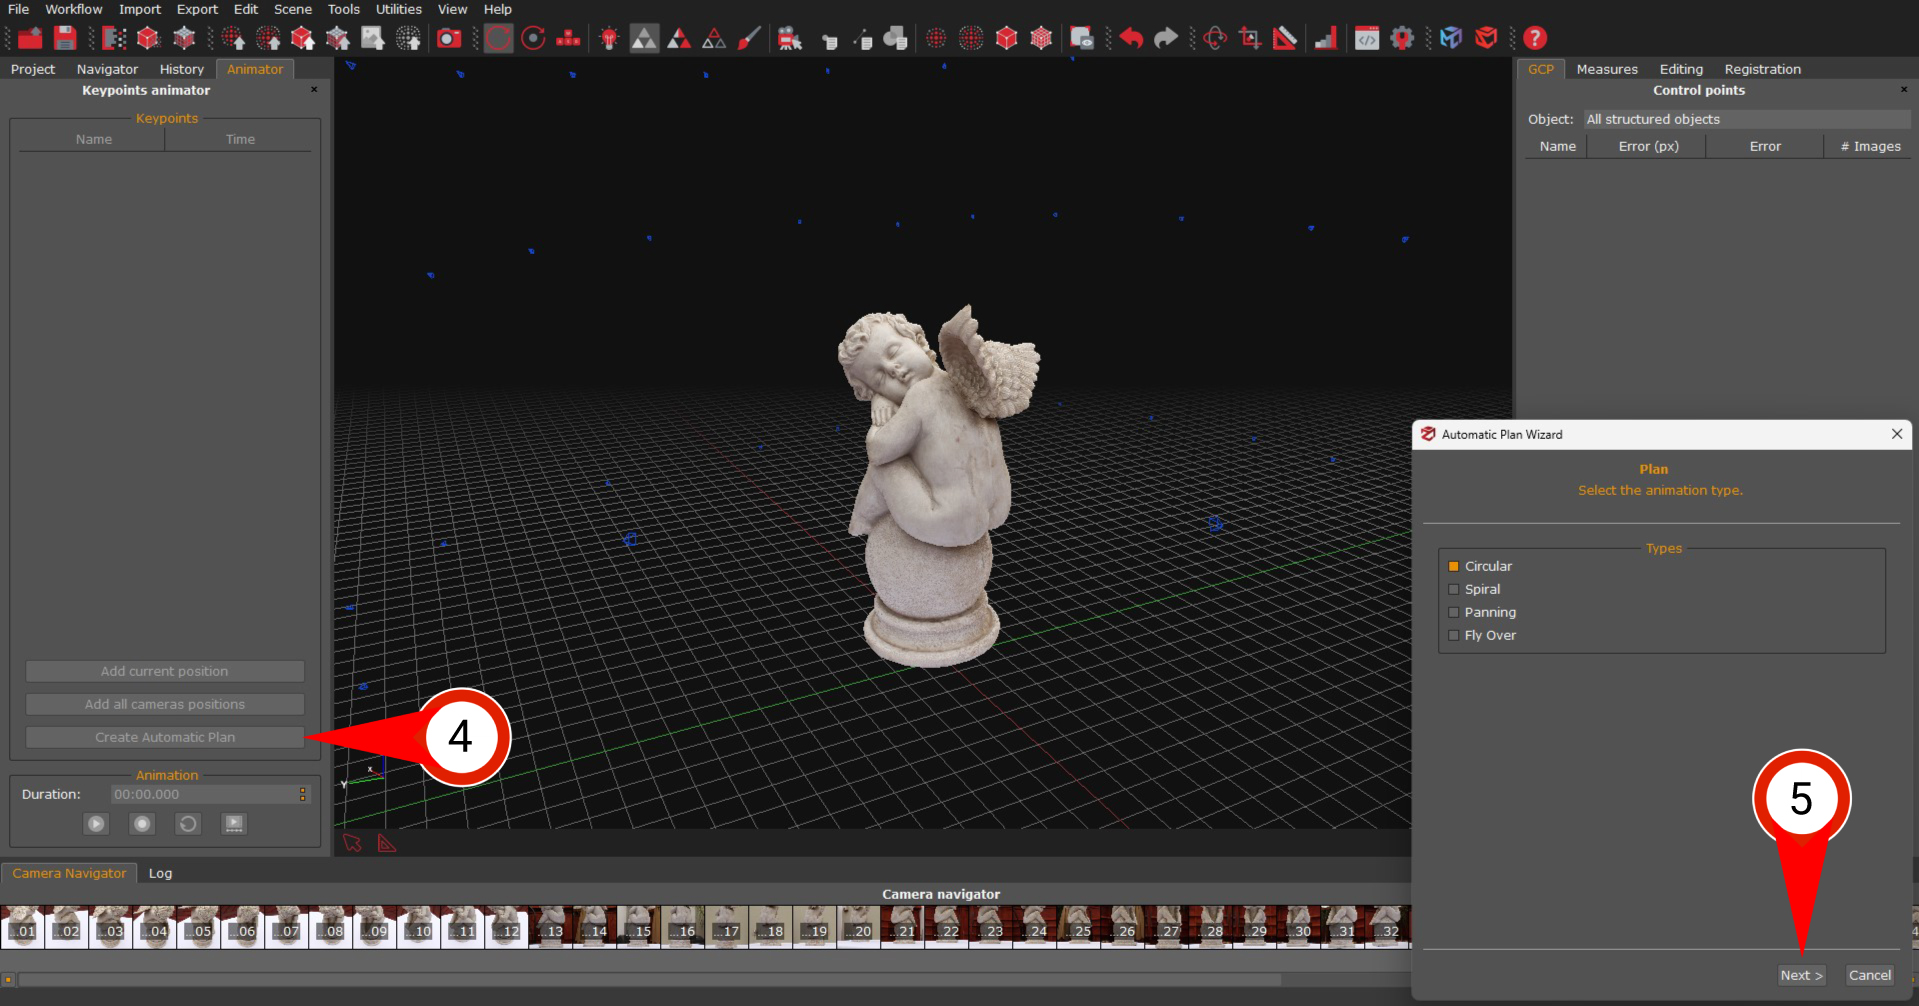
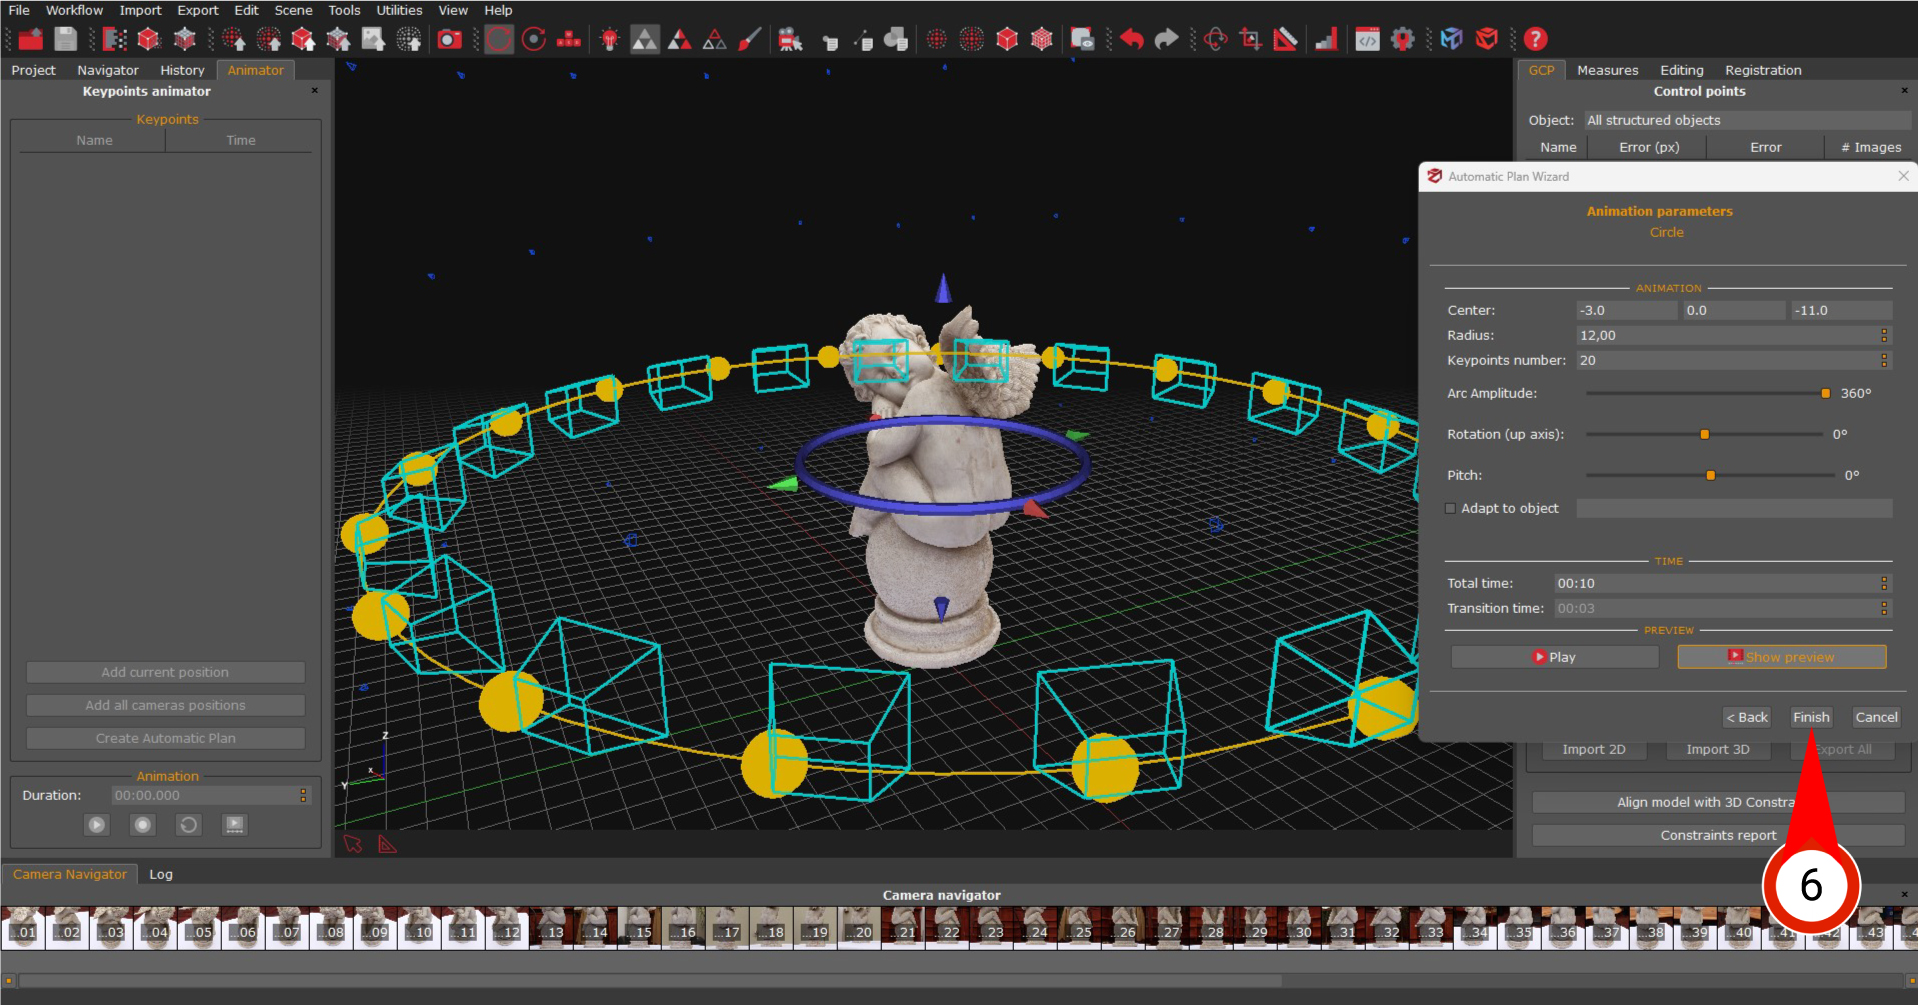
Click the “Create Automatic Plan” (4) button and choose the circular, spiral, panning, or fly-over type. Click the “Next” (5) button to switch to the settings panel of the selected automatic path. A preview of the path will appear in the 3D workspace automatically.
- Circular: circular trajectory around the target element. Radius, height, and axis of rotation can be defined;
- Spiral: multiple orbits going up around the mesh. It extends the previous type, stacking multiple circles with decreasing radius;
- Panning: movement parallel to the current view plane: the camera moves perpendicular to the pointed direction;
- Fly Over: smooth cascade motion on top of the mesh coming with adaptable parameters of slope and trajectory length (useful for aerial datasets including nadiral pictures).
Click the “Finish” (6) button once you are done with the automatic path parameters, and the keypoints will be listed in the Animator tab automatically.
Step 3 – Exporting an animation
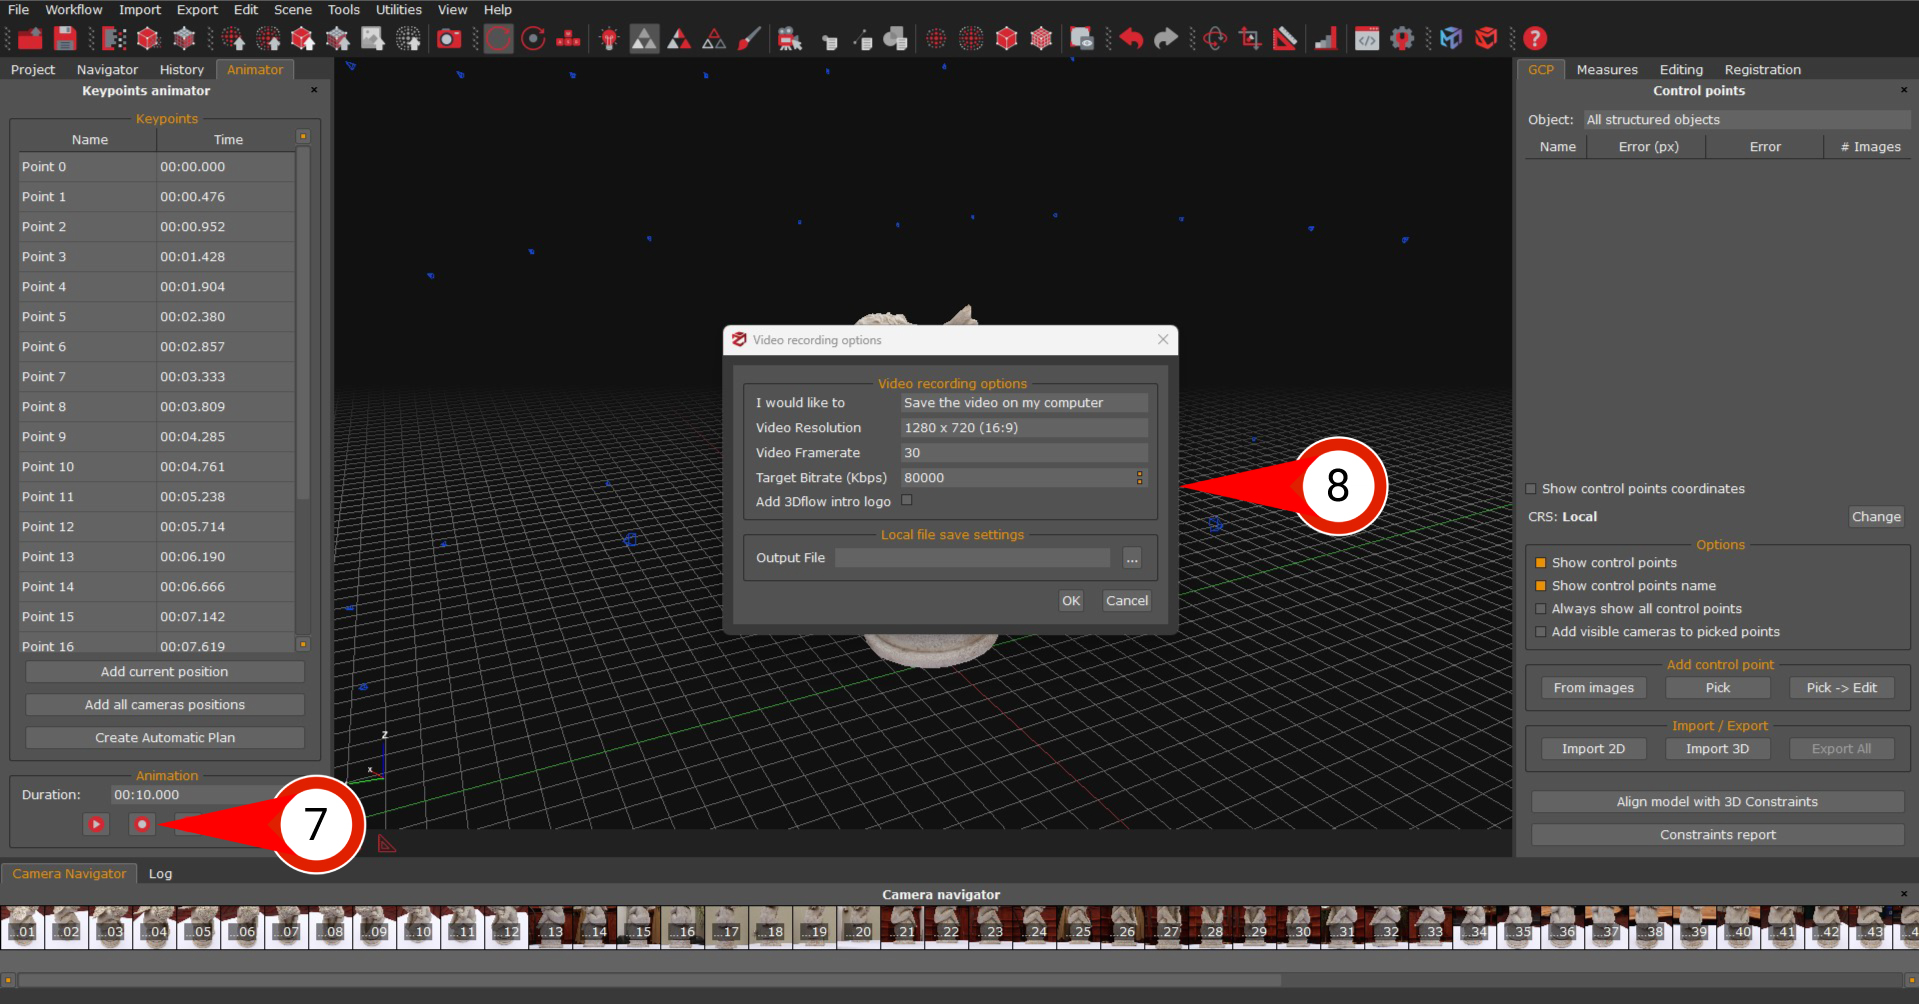
Click the “Record” (7) button in the Animator tab and set the export options in the “Video Recording Options” (8) window .
When exporting, you can save the movie as a .mp4, .avi, or .wmv file on your computer, export it directly to YouTube, or both.
The other options are self-explanatory: pick your desired resolution, framerate, and quality settings/bitrate and you’re done!
Click the “OK” button and 3DF Zephyr will create the movie for you and save it to the location you specified.
When exporting to YouTube, other options will pop up that will allow you to set the title, description and tags of your video, as well as the option to save/force a new Google login.
Please remember that once the movie is uploaded, YouTube will take a while to process it!
The next tutorial will show how to use input videos instead of images. Click here to proceed to the next tutorial.