Tools - Options
By clicking the wrench icon  in the toolbar or selecting Tools > Options in the menu bar you can enter the Options window arranged in nine tabs:
The search bar above the option tab can be used for searching options with key words.
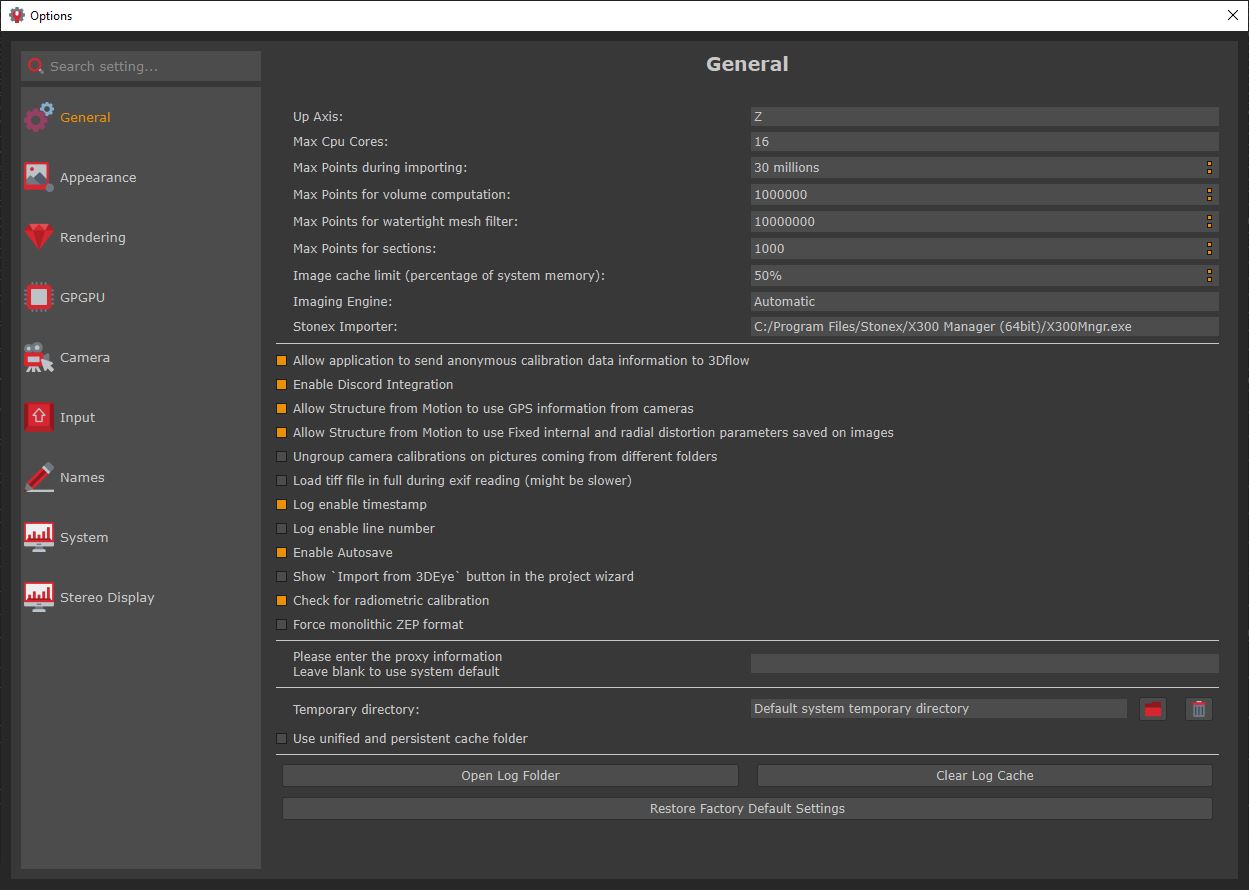
- The General tab can be used to set Zephyr functionalities, import limitations, access to the log folder, and restore default settings.
- The Appearance tabs allow you to set the overall look and feel of the 3DF Zephyr Window, including language, theme, font size and more.
- The Rendering tab allows you to edit 3DF Zephyr graphic appearance. You can modify the colors of several items ranging from the workspace to the grid and control points.
Among the most used settings:
- For the viewport, you can change its color with default and custom themes, and also set a Skybox for your 3D model, either by selecting from the panoramic default images (source: HDRI Haven) or by uploading your own panoramic pictures within the "Skies" folder present in the 3DF Zephyr directory.
- For point clouds generated within 3DF Zephyr, you can change the graphic size of individual points.
- For the cameras, you can edit at any time the alpha channel which is useful to set both the images transparency and the size and color of cones detecting shots in three-dimensional space.
- You can enable/disable GPU processing, either globally or per-single card, in the GPGPU tab.
- The Camera tab allows you to set values for the camera movement parameters. Also allows managing the connection with 3D devices.
- The Input tab allows managing hotkeys bindings.
- You can set the desired default names for generated elements in the workspace in the Names tab.
- In the System tab, you can toggle (and customize) sleep hours, in which Zephyr will automatically shut down the computer if all computations have finished as well as define other system options.
- The Stereo Display tab allows managing connection with 3D monitor.