3DF Masquerade
3DF Masquerade is a standalone external tool (included in all 3DF Zephyr versions) to create masks to pair with the images to be processed in 3DF Zephyr. A mask is defined as a specific selection of one (or more) images that allows to force zephyr to ignore the corresponding part in a picture. The first time you run Masquerade useful tooltips will appear on the screen that will teach you the interface basics.
A complete tutorial (and video tutorial) about 3DF Masquerade can be found at the URL http://www.3dflow.net/en/technology/documents/3df-zephyr-tutorials/tutorial-use-masking-tool/.
Masking action in 3DF Zephyr can be performed with two modes:
1) Automatic masking: based on machine learning model.
2) Manual masking: carried out using masking tools in the Masquerade interface.
Starting 3DF Masquerade
3DF Masquerade can be launched as an external executable and used independently from 3DF Zephyr.
1) From the Windows Start Menu: typing ‘masq‘ in the search bar to locate and open Masquerade
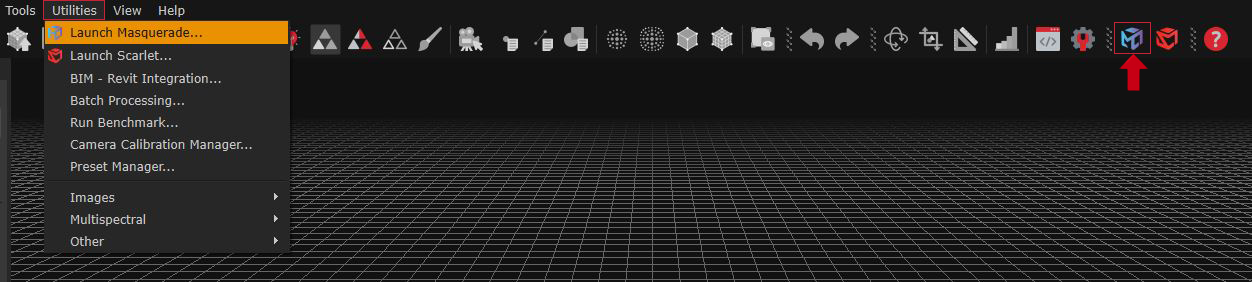
2) From the 3DF Zephyr workspace:
- Via menu bar: navigating to Utilities > Launch Masquerade.
- Via toolbar: clicking on the Masquerade icon.
3) From the New Project Wizard menu:
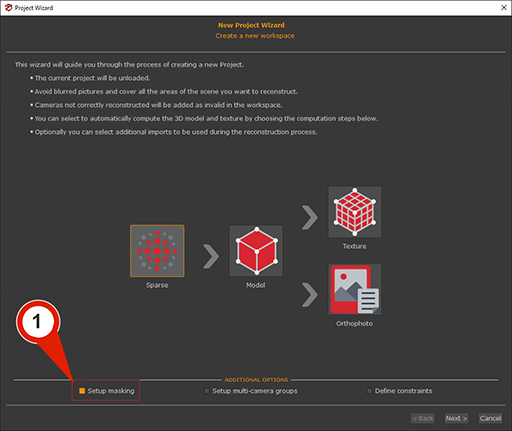
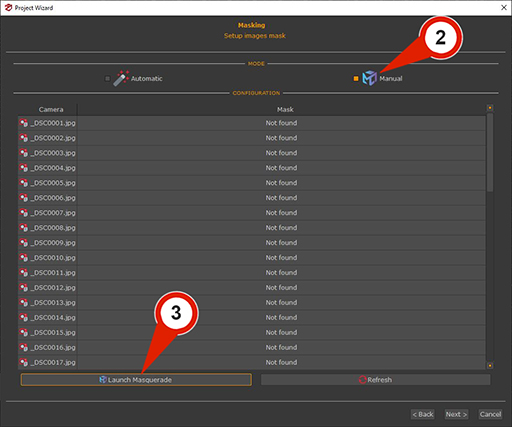
In the first page of the New Project Wizard, the "Setup Masking" (1) checkbox must be selected. Clicking the "Next" button advances to the photo selection phase, where images are loaded automatically. Clicking "Next" again proceeds to the Masking page, where the "Manual" (2) checkbox must be enabled to display the image and mask list and activate the "Launch Masquerade" (3) button.
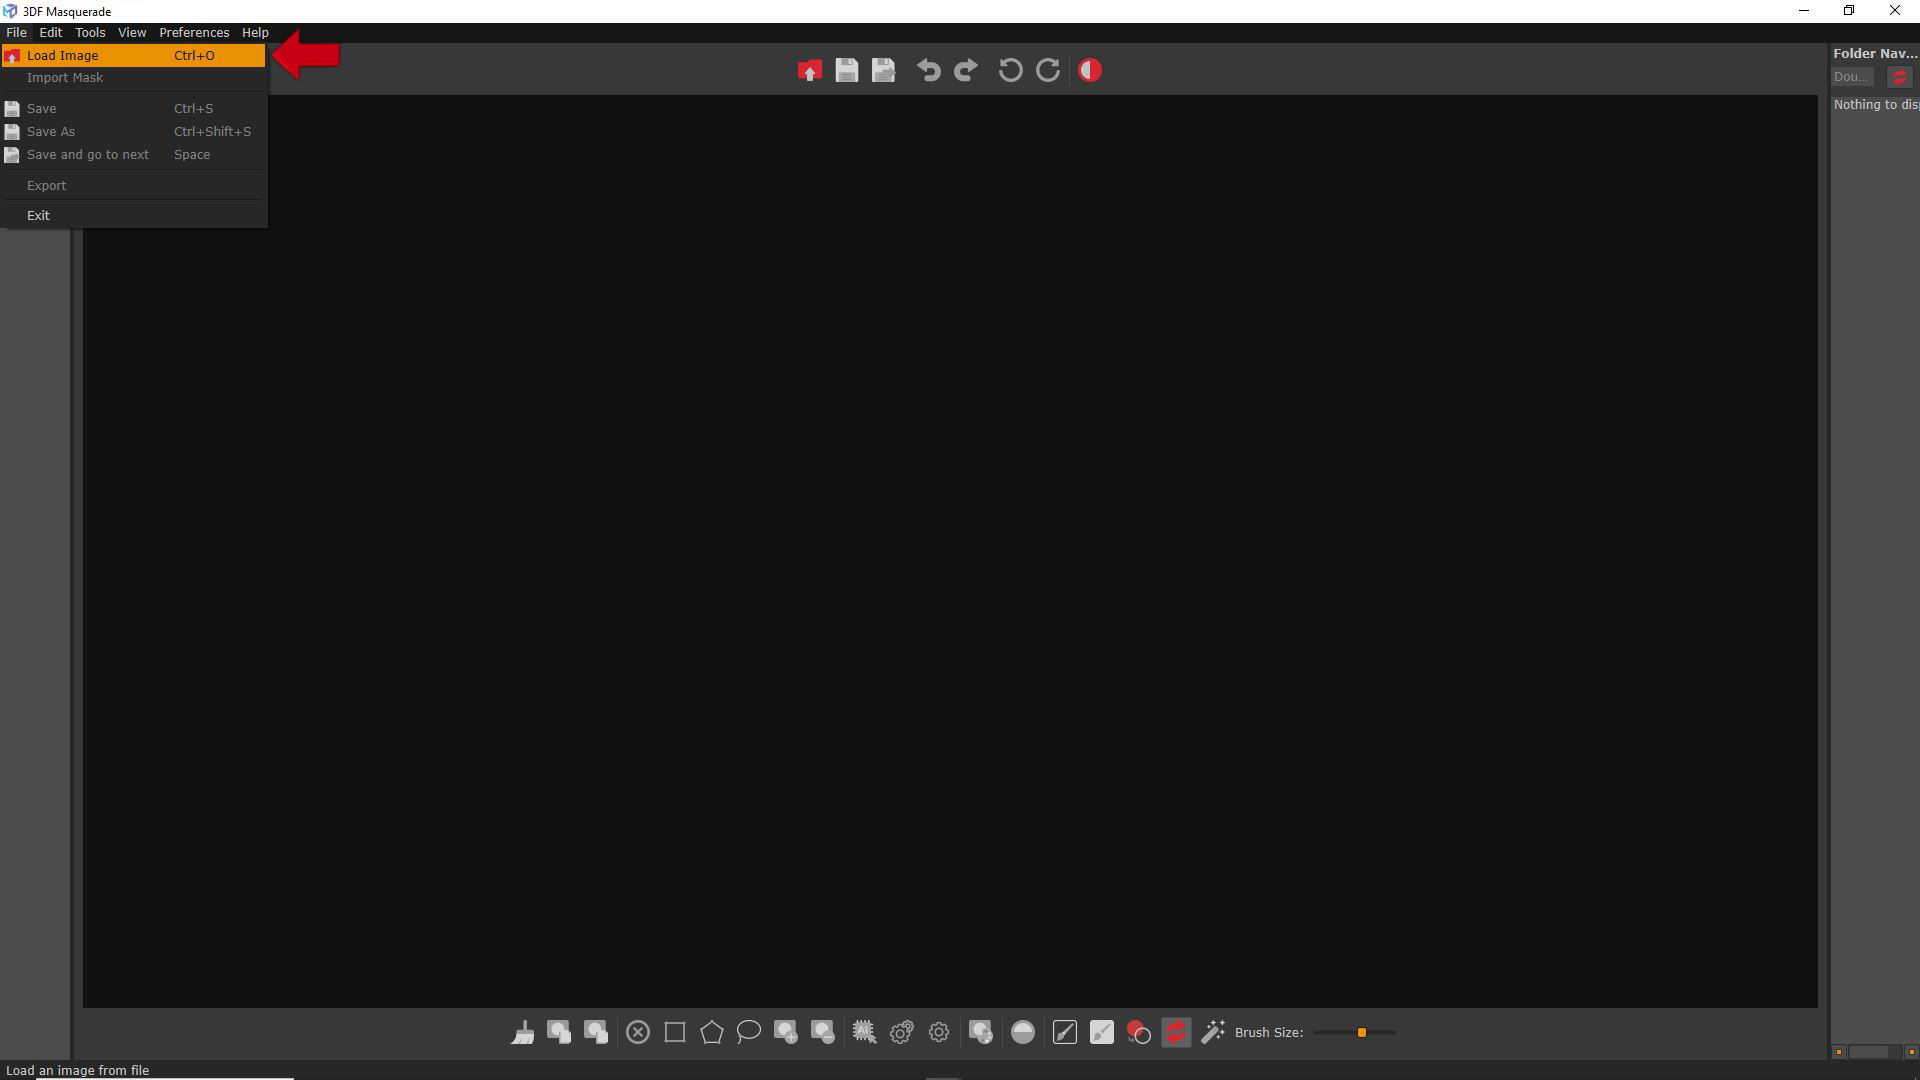
The Images can be loaded inside Masquerade from the menu: File > Load image.
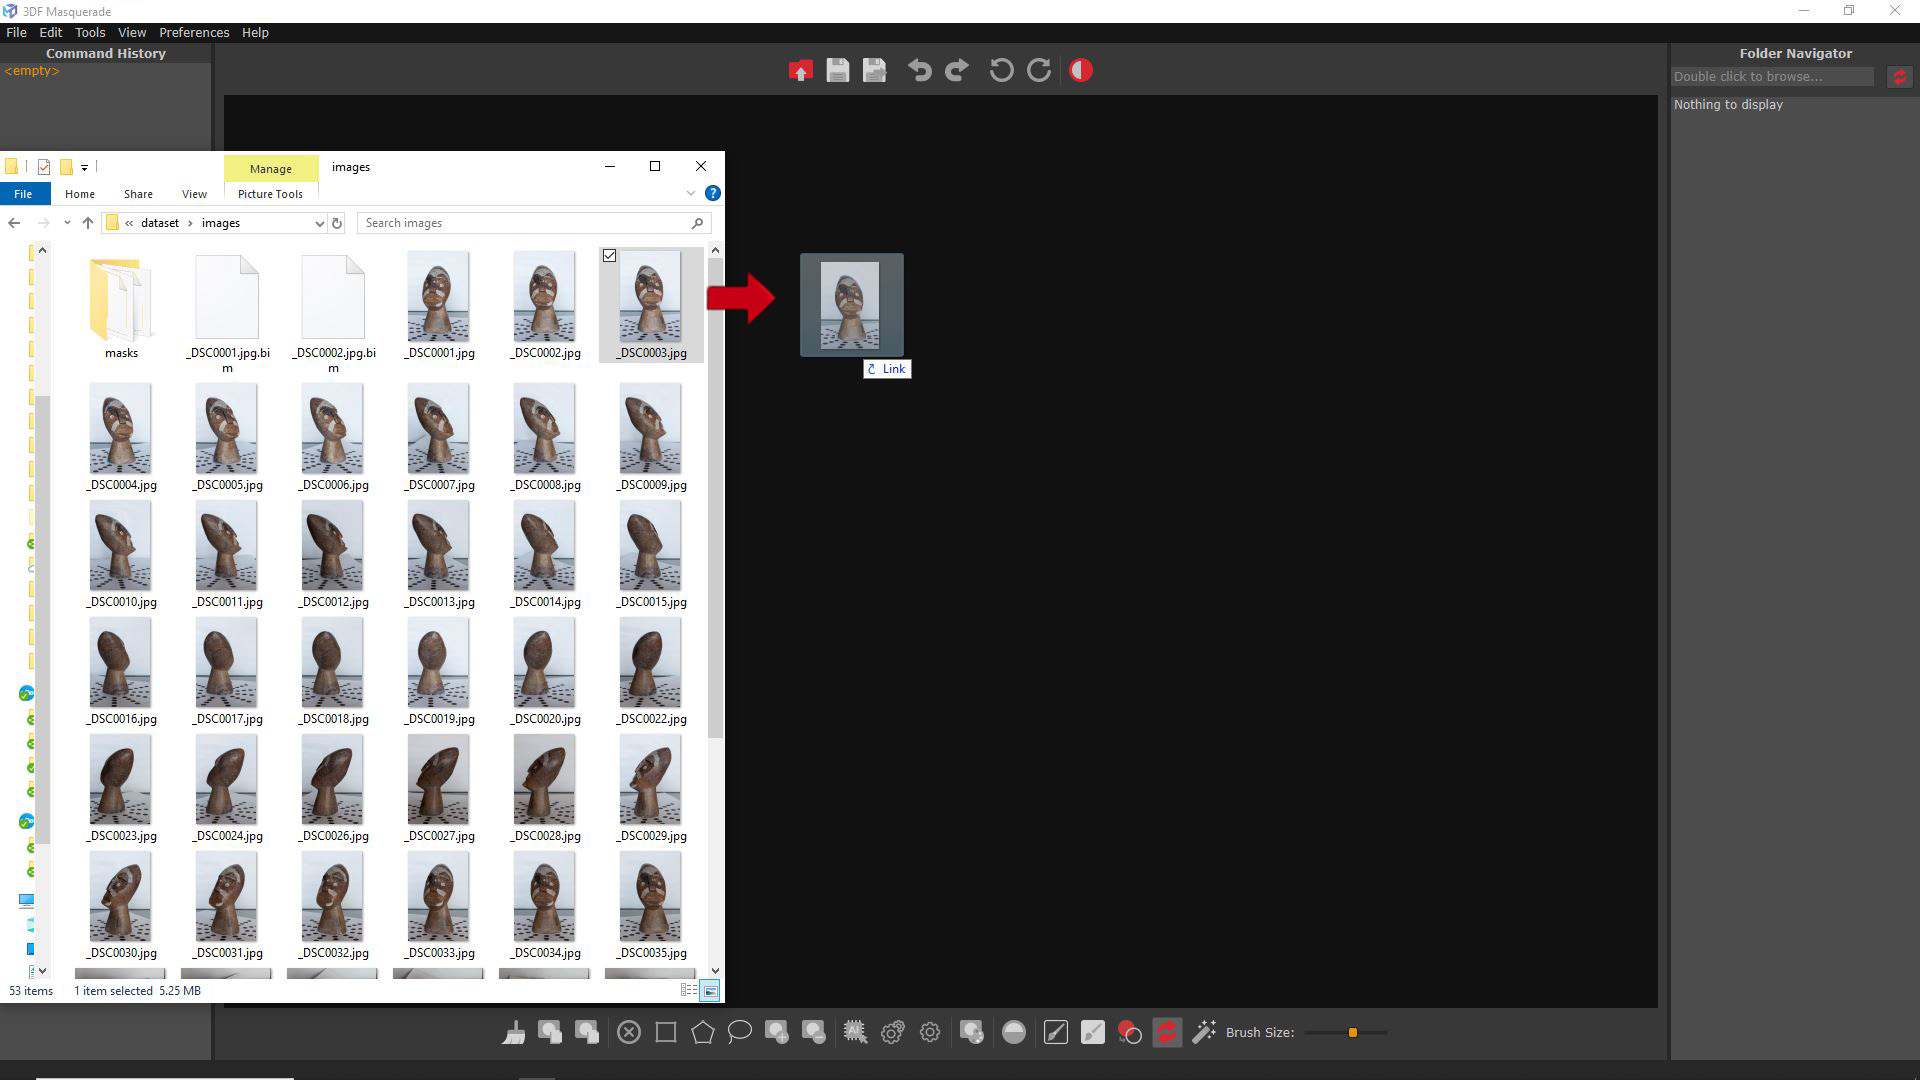
Alternatively, it's possible just to drag and drop the first image in the workspace to load all the images in a folder.
The 3DF Masquerade Interface
The 3DF Masquerade interface is divided into these sections:
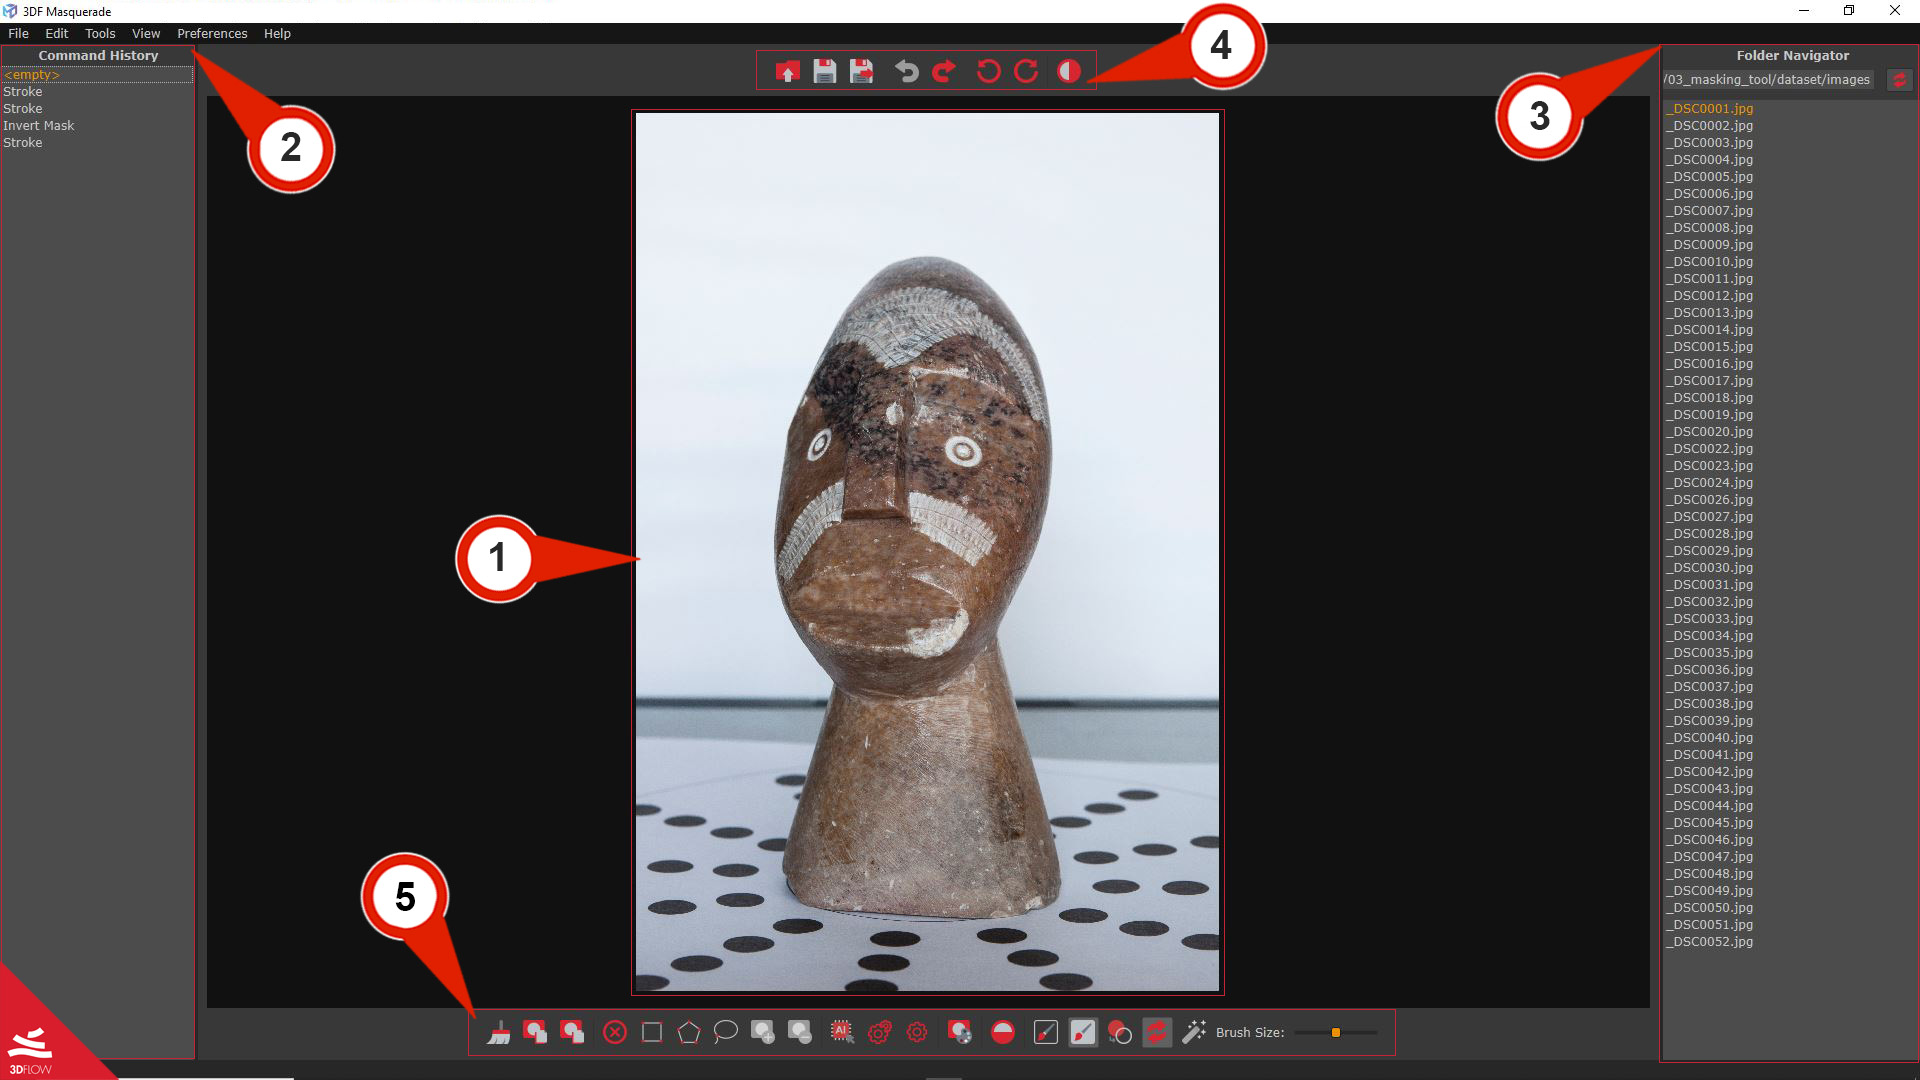
- Masking workspace (1) – allow to visualize each picture and work with the masks tools.
- Command history (2) – can be used to undo/redo actions taken in 3DF Masquerade.
- Folder Navigator (3) – This panel, facilitates quick navigation through images, that will be associated with created masks and marked with a “(M)” symbol. Right-clicking within the panel provides access to the following commands:
- Select All: Selects all listed images and their corresponding masks.
- Show in Explorer: Opens the folder containing the selected image and highlights it.
- Delete Mask for This Image: Permanently removes the mask associated with the selected image from the folder.
Note: Using the Select All and then use the “Delete Mask for This Image” commands will permanently delete all masks in the current project.
- Upper toolbar (4) – provides quick access to core editing tools for managing the masks.
|
|
Load image: the command allows to select an image load all the pictures inside Masquerade. |
|
|
Save: this command allows to save the mask just modified |
|
|
Save and go next: the command allows to save the modified mask and go to the next image automatically |
|
|
Undo / Rendo: this command allows undoing or redoing previously performed actions. |
|
|
Rotate clockwise / Rotate counter-clockwise: this command allows rotating the image. |
|
|
B/W Mask: this command allows viewing the black-and-white mask of each image. |


- Lower toolbar (5) – it contains several tools for masks/unmask images.
|
|
Clear mask and Strokes: the command allows to cancel the image current mask and all the strokes made with the brush tools. |
|
|
Copy current mask to next image: this command allow to copy the mask to the current image to the next one. |
|
|
Copy current mask to all next images: this command allow to copy the mask of the current image to all the other images of the project. |
|
|
Cancel selected tool: the command allows canceling the current selected tool. |
|
|
Rectangle selection: this command enables the creation of a selection by dragging a rectangle. |
|
|
Polygon selection: this command allows the addition of nodes to a polygon path using the cursor’s left-click. The path is automatically closed by double-clicking. |
|
|
Lasso selection: this command allows the selection of the images with the lasso mode. |
|
|
Add Mask to selected area: this command allows to add the selection to the current mask. |
|
|
Clear mask from selected area: this button allows to clear a selection from the current mask. |
|
|
Select auto-magic algorithm model: this button allow to select or download the machine learning model which will be used by the automatic computation algorithm. |
|
|
Automatic masking for all images: this button allows to automatically compute all the masks of the remaining images. |
|
|
Automatic masking for the current image: this button allows to automatically compute the current image mask. |
|
|
Mask from colors: this button allow to create a mask starting from RGB colors. The tool can be use to select a color from the image background and then the Threshold and the Gauss iter settings to set the range of color for masking. |
|
|
Invert current mask: this command allows to invert the mask. |
|
|
Brush foreground : this command activate the brush tool for marking the image’s parts to include in the mask. |
|
|
Brush background stroke: this command activate the brush tool for marking the image’s parts to exclude from the mask. |
|
|
Masks to strokes: this button allow to convert the masks on the current images to strokes. |
|
|
Automated masking after each stroke: this command toggle the automated masking computation after each stroke is marked on the image. |
|
|
Compute mask from strokes: this button allow to auto-compute the current image after both Foreground and Background strokes are marked. Note: it can be enabled only when the “Automated masking after each stroke ” is disabled). |
|
|
Brush size: the brush size slider allows to set the dimensions for the Foreground and the Background stroke tools. |