Automatic Masking
The automatic masking will use a machine learning model to automatically generate masks from images.
Masking can be done as a standalone proces inside Masquerade, or prompted directly in 3DF Zephyr when opening Workflow > New Project Wizard.
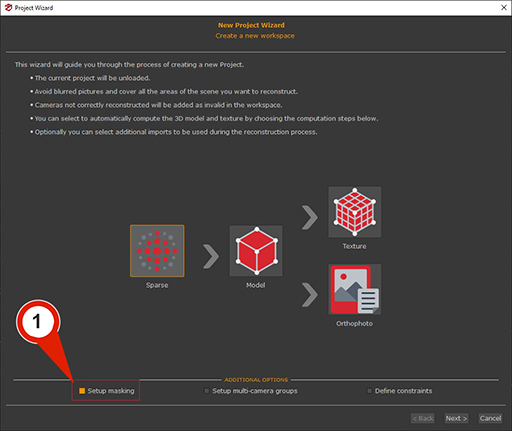
On the first page, ensure that the "Setup Masks" (1) checkbox is selected. Clicking the "Next" button advances to the Photo Selection phase, where images can be loaded automatically.
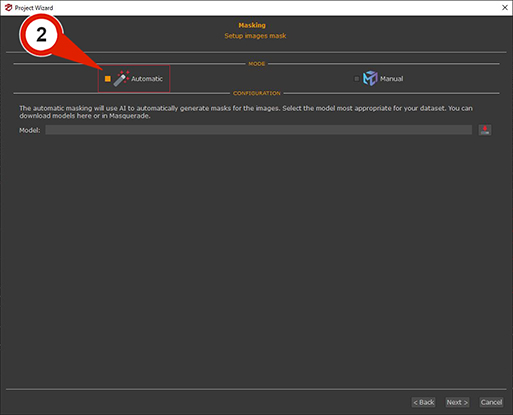
Clicking "Next" button again let to proceed to the Masking page, where the "Automatic" (2) checkbox is selected by default.
To use Automatic masking, an AI model must be selected or downloaded from the Model dropdown menu. The General model is optimized for general use and is particularly effective for close-range datasets.
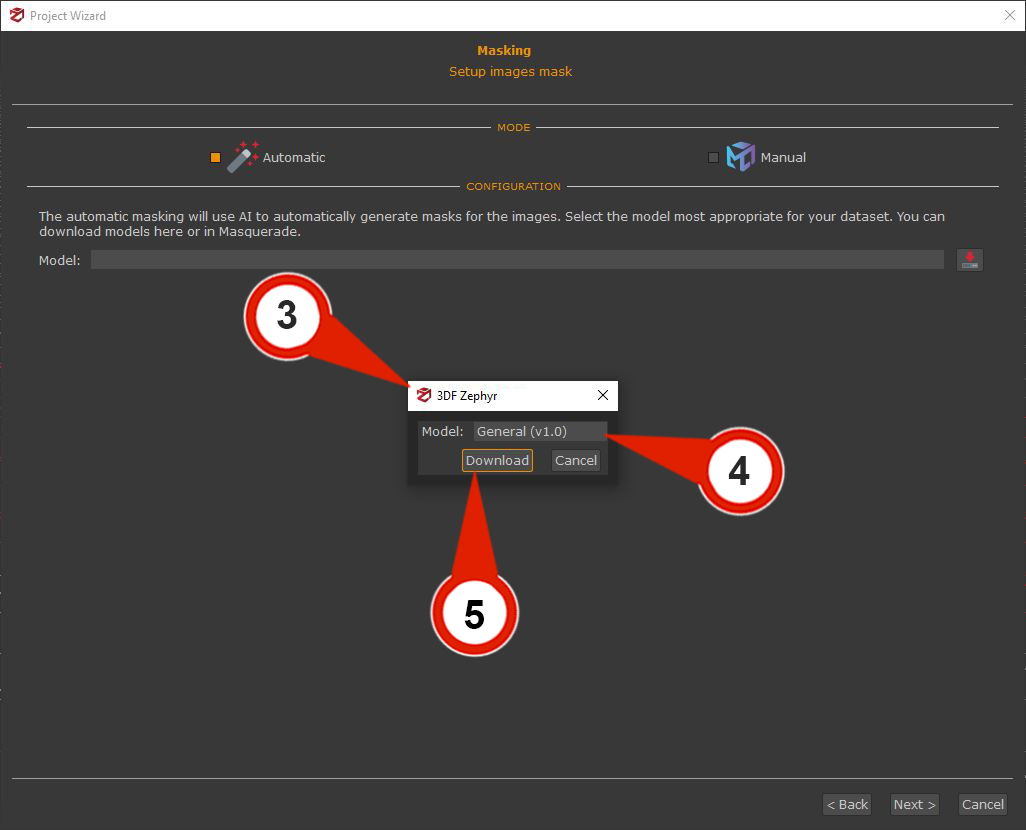
If no Model is present, just click the "Download" button  to open the Download dialog (3). Then, a desired model can be chosen from the Model (4) dropdown menu.
After selecting the model, click the “Download” (5) button to start the download.
After the Model is set, press the "Next" button to proceed with the New project creation workflow.
Automagic tool
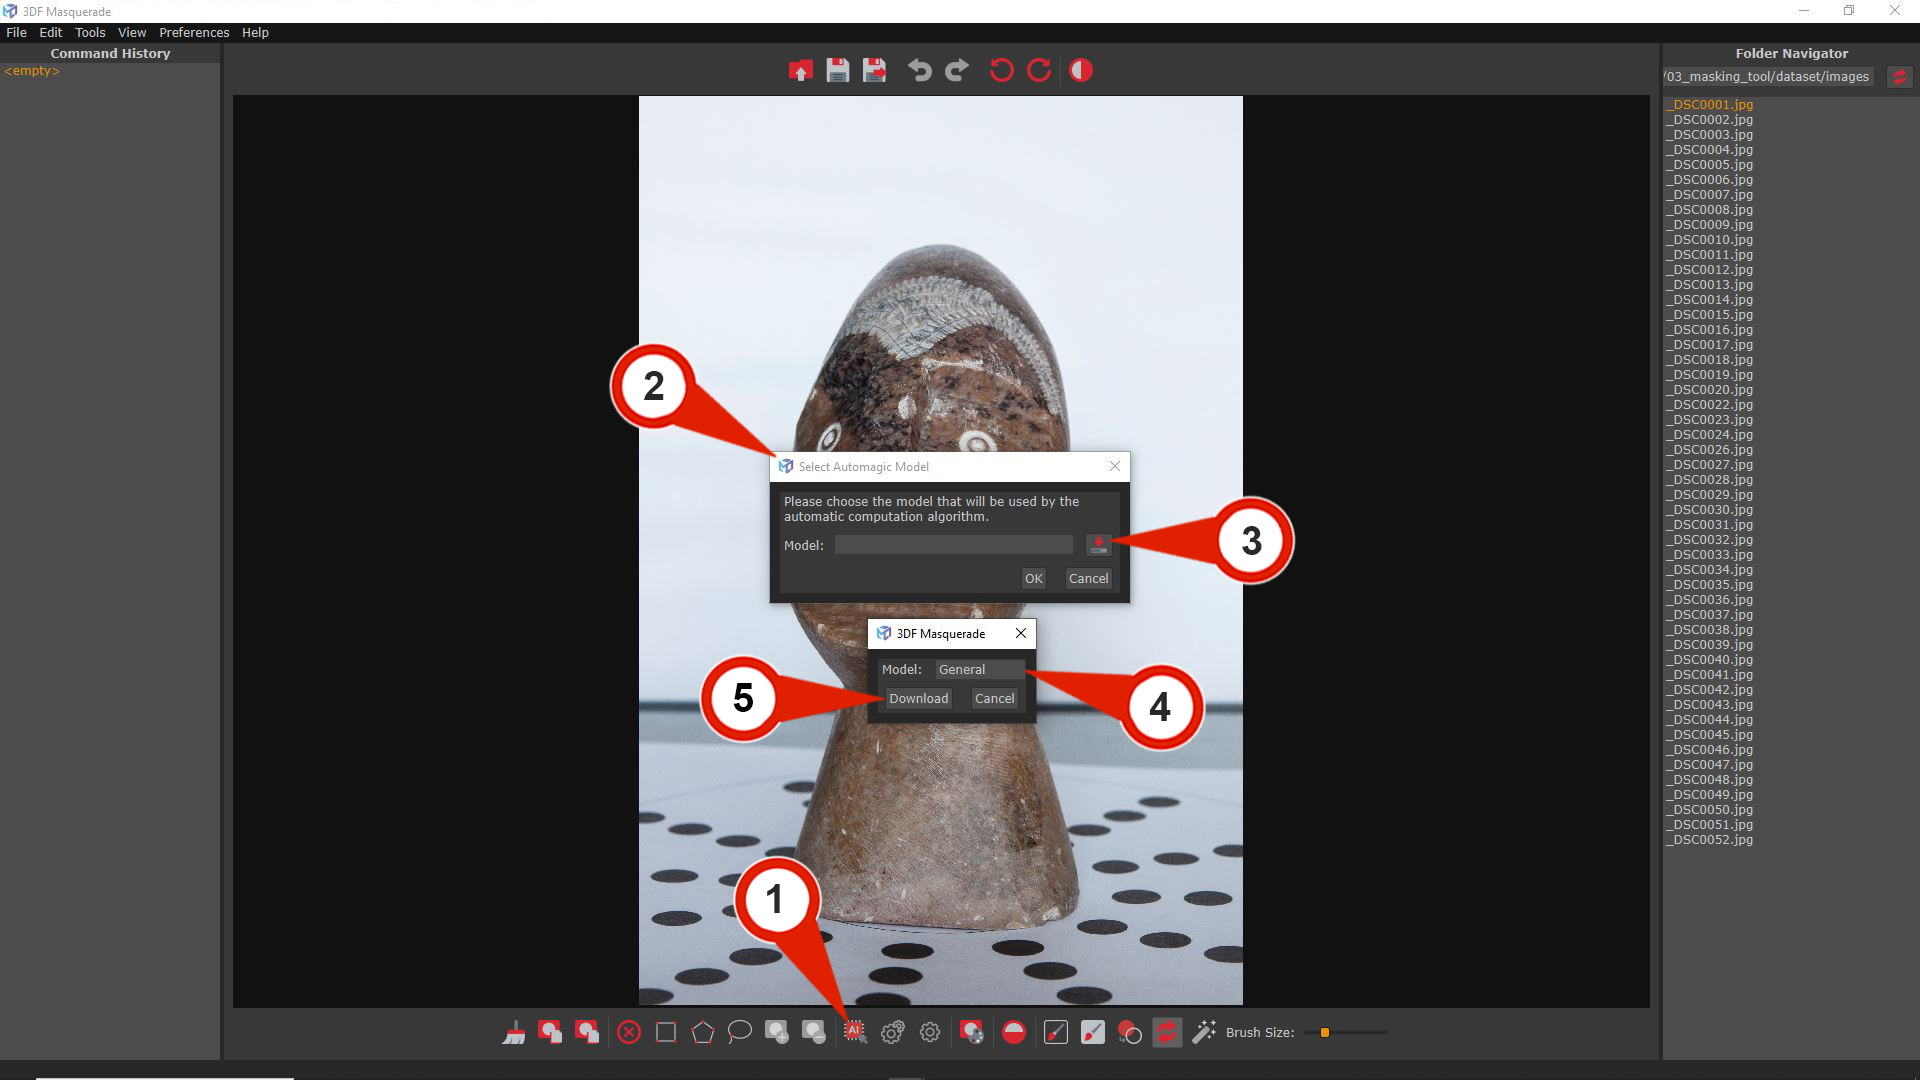
The automatic masking can be performed by the Automagic tool in the Masquerade interface.
To use the tool, click the "Select Automagic Model" (1) button to open the Select Automagic Model (2) window. From there, you can select a machine learning model. If no models have been downloaded, or if you need to download a new one, click the "Download" (3) button to open the Download dialog.
You can then choose the desired model from the Model (4) drop-down menu. The General model is optimized for general use and is particularly effective for close-range datasets.
After selecting the model, click the “Download” (5) button to start the download.
Once the download is complete, the model will be available for use with the Automagic tool to generate masks. The following commands are available in the lower toolbar:
- “Automatic masking for the current image”
 : Generates a mask for the current image. To simplify the process of generating individual masks for each image, the “Enter” key can be used to calculate the mask, followed by the ““Space” key to save the mask and move to the next image.

- “Automatic masking for all images”
 : Automatically generates masks for all images. Clicking on the button a dialog will appear, and choosing “YES” will allow Masquerade to generate masks for all images.

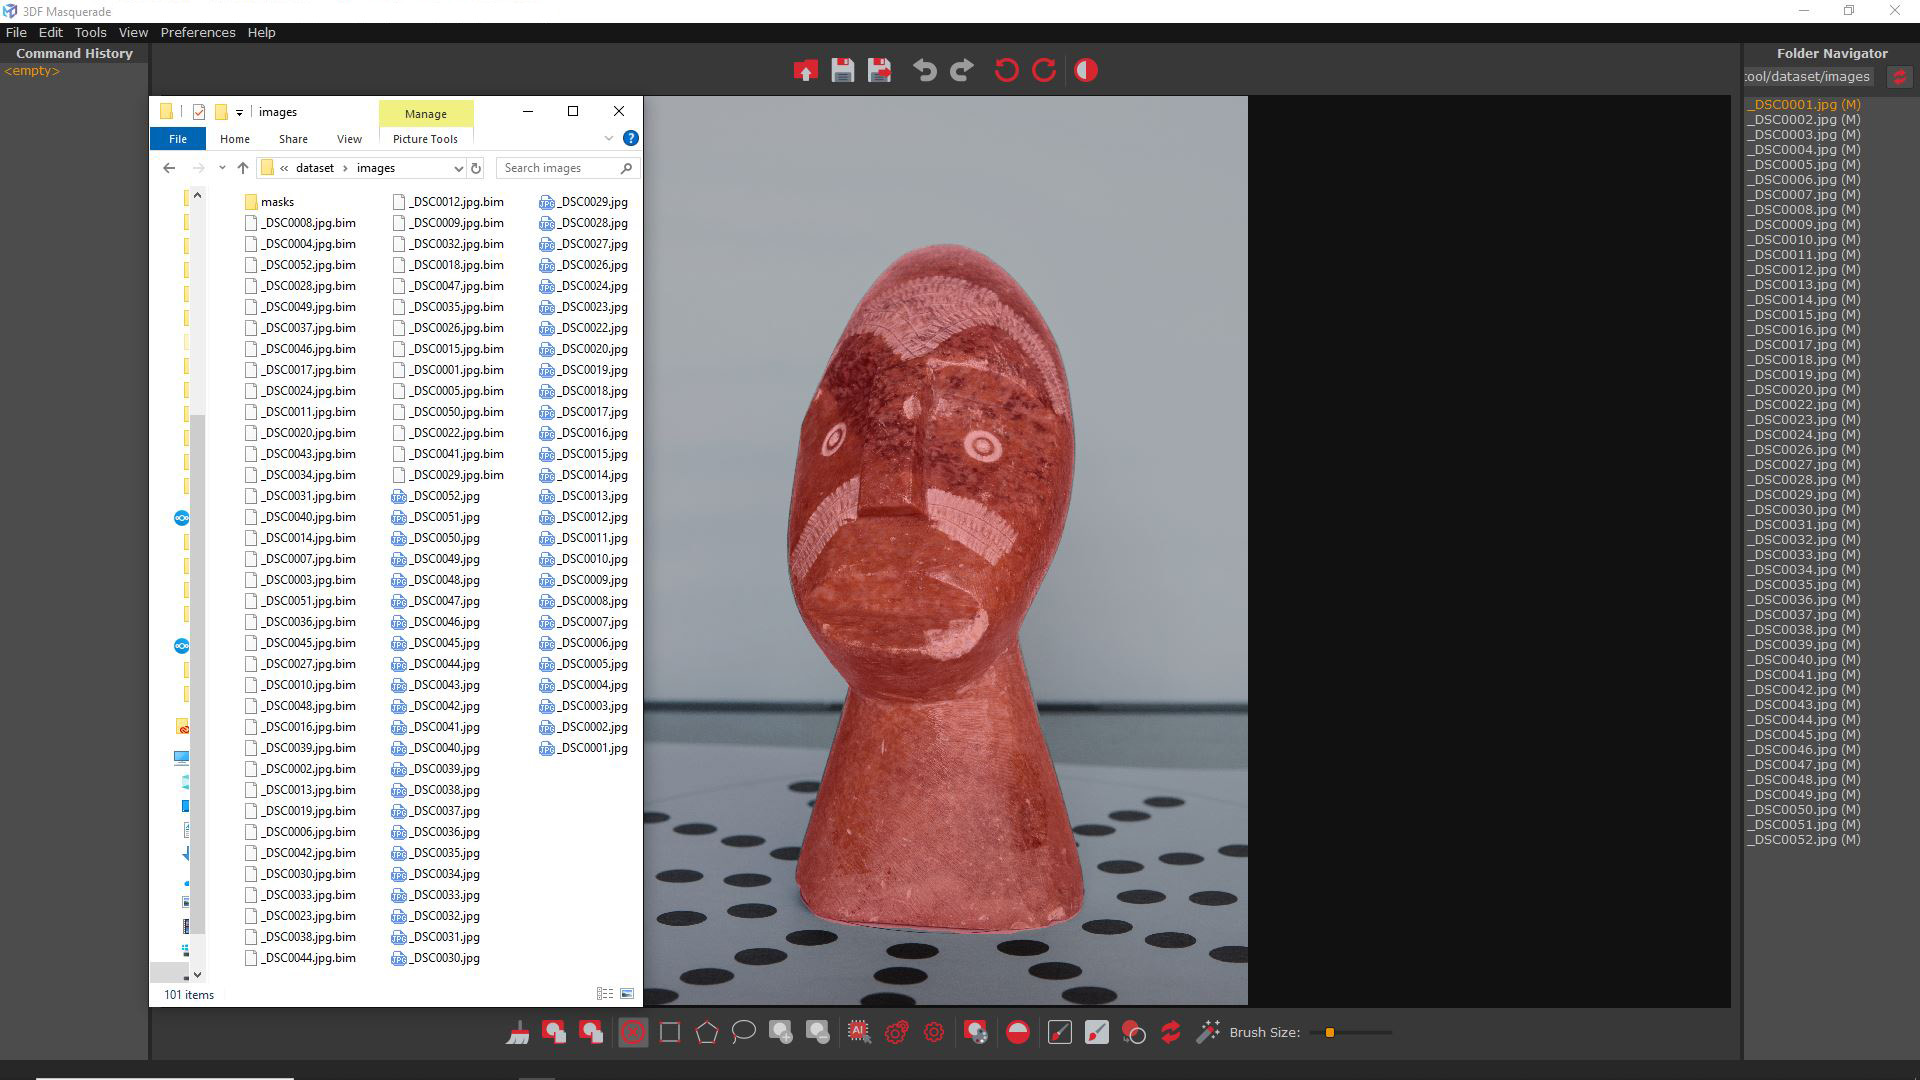
All the images in the Folder Navigator will be marked with “(M)” and each of them will have a mask in .bim format saved in the directory.