Print Markers and markers use
This chapter explains how to use coded targets in 3DF Zephyr in order to further improve the camera orientation phase.
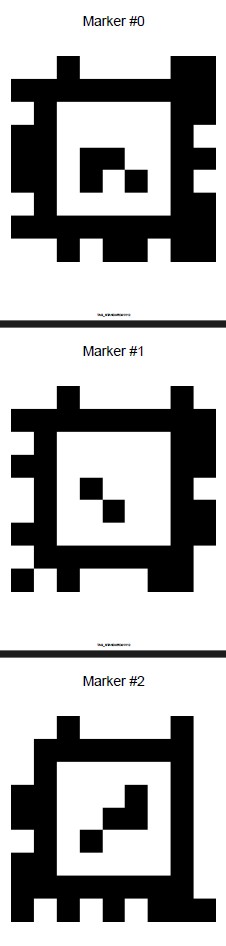
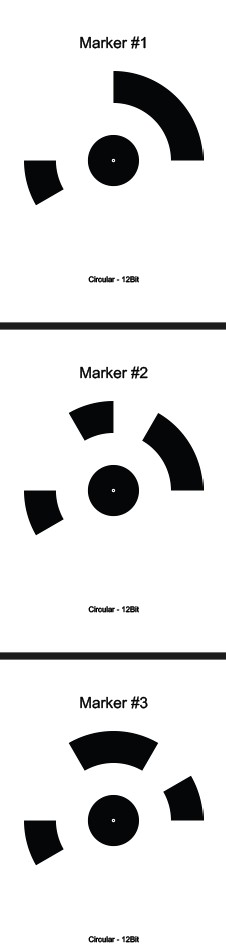
3DF Zephyr’s coded targets are of different types and shapes (see image below).
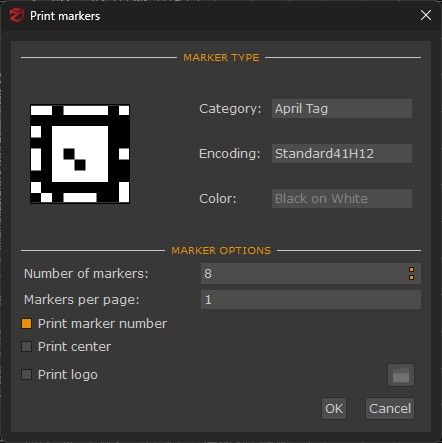
Coded targets can be printed by clicking Tools > Control points > Print Markers. Additional options are available, such as "print logo", "print (target) center", and "print marker number".
3DF Zephyr supports 16 bit coded targets, and the printing size strictly depends on the scene/subject features.
Recommended settings are as follows:
General and Human Body 4 targets per sheet (A4 size)
Urban 2 targets per sheet (A4 size)
Aerial 1 target per sheet (A4 or A3 size)
You can define the number of targets per sheet by editing the printing menu settings on Windows (in that menu, the term “page” refers to a target).
It is recommended NOT to use coded targets randomly; instead, they should be used in their numerical sequence (1, 2, 3, 4, etc., and not 4, 13, 22, etc.).
With 3DF Zephyr, you can also automatically detect standard targets, including square, circular, or custom ones.
Once the image capture is complete and the camera orientation phase is finished, you can start the automatic detection of coded targets by clicking on Tools > Control Points > Detect Markers.

In the new window, you need to specify:
- The marker category, encoding and color: select which markers have been used on-site.
- Subsampling [1.0 - 10.0]: the detection is performed on a subset of pixels of the original image, can be seen as shrinking the original image by the provided subsampling factor prior to the detection. As an example, a subsampling of 2.0 will rescale a 100x100 pixel image to a 50x50 pixel image. Higher subsampling will speed up the detection considerably, but might give worse results.
- Gaussian blur intensity [-0.5 - 0.5]: blurs the original image prior to the detection, may aid the detection in case of noisy images. The higher the blur value, the more the original image gets blurred. Negative values act as a sharpening filter instead, increasing contrast along edges.
- Number of markers: markers with ID's higher then the "number of markers" are ignored. This is useful to reduce the number of false positives when the maximum ID of the marker is already known. As an example, setting the "number of markers" to 4, will allow for the detections of markers 0 to 4, avoiding to detect any marker with ID higher than 4.
- Minimum projections [2 - 10]: minimum amount of times a marker needs to appear in each image before being considered a valid marker. This value should be lowered if markers are not being detected, should be increased in case of many false positives.
- Maximum reprojection error [0.0 px - 10.0 px]: markers whose estimated 3D position is inconsistent between different images are ignored. This value should be lowered when not many markers are detected, should be increased when marker position precision is a priority.
- Minimum projection angle [deg] Markers from images that are too "aligned" with each other (not enough angular diversity) are removed to avoid errors during triangulation, keeping only those with sufficiently different viewpoints.
After clicking the "Detect" button, 3DF Zephyr will start the automatic target detection and will set the control points based on the detected targets.